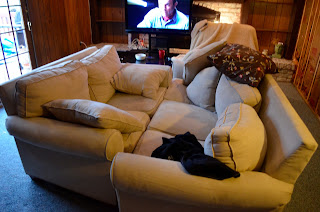
The room we spend the most time in and the last room to be touched this year: The Family Room. Oh how this room had transformed. This room needed more than a paint job to fix it. We had many things that needed to be done. It just happened to work out that about the time I was ready to do this room, I was going on Spring Break. That allowed me to have a full week to work on this project.
 The first thing I did to change the room was to paint the fireplace cover and white wash the brick a few weeks ago. It looks awesome!
Day 1: Friday
Chris and I spent our first evening on the project by moving the furniture (I used my furniture movers of course!) and removing the trim. And of course we watched basketball while eating pizza!
Day 2: Saturday
Our first task of the day was to take down the paneling. We actually budgeted the entire day to taking it down. And it took us an hour and a half. We put all of the paneling on the back deck under a tarp (waiting for the snowstorm).
Saturday morning Lowes was supposed to deliver our drywall and joint compound (we thought we would save our backs a little bit and have Lowes deliver 50 lbs of joint compound and 13 pieces of drywall that were 80 lbs each). Instead, when I called they said they had our delivery date for April 6th. Luckily the people at Lowes heard my frustration and had it delivered by 4:30. Better a few hours late than weeks late.
Since we did not have drywall, we went to Lowes to pick up the remainder of the things we needed. As many of you know during a home improvement project you are constantly running back to the store.
 We decided we wanted to paint the book shelf and mantle around the fireplace. So while we watched basketball I primed and began to paint the bookshelves.
Later that afternoon Tom and Debbie came up to help us move an outlet. Our outside lights were on switches by the back door. The problem was they put it on the left side of the door. You exit the door from the right side and we often have furniture in front of the side of the door that does not open, making it awkward to turn on the light. So Tom moved the switch from the left to the right.
Day 3: Sunday
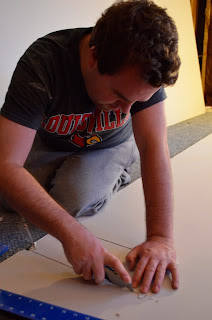
 We started our Sunday like good people should, at Bob Evans. We also had to run to Home Depot to get shorter drywall screws for our cinder block wall. We then started the drywall! It was really easy with the drywall saw we bought.
Unfortunately the outlets needed to be moved out further (the drywall was thicker than the paneling). Chris diligently took his time and moved all of the boxes out.

We then started hanging drywall. It is not a very difficult thing to do, just time consuming. Measuring, cutting, and hanging. We were able to get all but one wall finished (the cinder block wall).
Day 4-6: Monday - Wednesday
 On Monday we finished the rest of the drywall. We also signed the concrete wall and put a picture of us in there. In case you know, paneling comes back and drywall is old fashioned. :)
The next step was to patch the seams and screws. I used mesh tape on all of the different pieces and then covered them with joint compound. I ended up using all 62 lbs and then some.
I painted all of the trim in the basement, I used semi -gloss paint like the rest of the house.
I also painted the ceiling using paint that starts purple and turns white when dry. It worked really well. I will definitely use it again.
Day 7: Thursday
Another layer of joint compound.
I was then able to prime the walls! It looked so good being so bright. When it became night time though I noticed a few places on the wall that needed more joint compound.
Day 8: Friday
Again I put up joint compound and sanded for hours.
I primed the newly patched pieces.
And the best part of the day was painting the room. The color is awesome!
Day 11: Monday
Chris and I decided to get new carpet for this room. We eventually want hard wood floors throughout the first floor but with all of the other things that have gone wrong in the house, we figured we should wait a bit. So instead of paying someone to do it, we tore out the carpet and padding on our own. The bare floor is so much better than the dirty carpet.
And added it to the pile of construction material in the backyard. :)

Day 13: Wednesday
Our door was delivered Tuesday. So our handyman Mark came to install it for us. The door looks so much better and it actually closes.
Day 14-15: Thursday- Friday
Mark came back and was going to put up the baseboards and trim near the ceiling because he had a nail gun. About 9 hours into it, Chris and I made the decision to stop him so we could finish. He did not do a very good job and as a result we would need to fix the mistakes.
Day 17: Sunday
Chris and I went to Lowes yesterday and bought Crown Moulding. It was so easy to put up. It took us (without really knowing what to do) about 1.25 hrs to complete. It looks fantastic. I think we are going to do it in more rooms throughout the house.
Day 19: Tuesday
There were lots of little projects left to do. Today I screwed the floor boards into the joists below. Our floors were really squeaky. The carpet installer advised we used deck screws. I fixed the broken pieces of baseboard. Painted the areas on the trim and baseboards that needed touching up. And painted the garage door that leads into the house.
Day 20: Wednesday
Wednesday was the arduous task of caulking the whole room. It really needed to be done around the doors and fireplace. Everywhere else it just makes the room look so much more polished and neat. I went through three bottles of caulk for the entire room.
Day 21: Thursday
Our carpet came in today! It looks so good with the room.
I also finished painting the back door. There is a little part between the two doors I cannot get too. I will have to figure that out another day.
Chris fixed and replaced the outlets and light switches on the garage wall.
The Before and After


No comments:
Post a Comment